Sunday, August 1, 2021
Portfolio 3 Week 3 - Ember's Textures
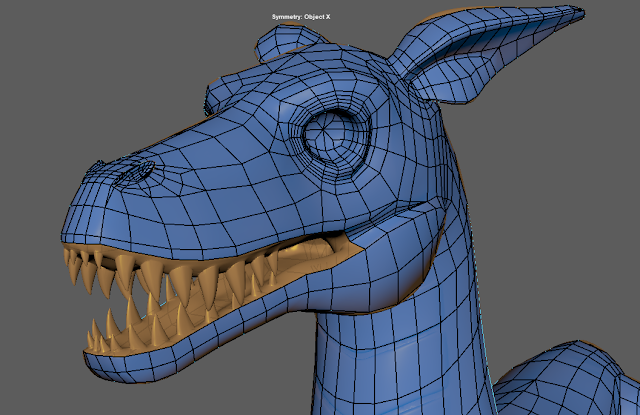
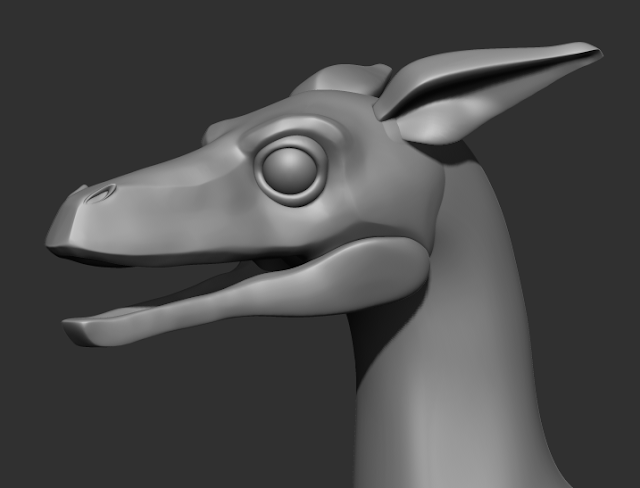
To be frank I did fall behind on Ember this week thanks to multiple real life factors + other school obligations + end of semester burn out. But I know that all I need to finish for Ember is just the texturing along the legs/feet, the tongue and teeth, and add some bones in the neck to match the concept art pose. I should be able to get all of this done by monday night and spend Tuesday and Wednesday working on getting posed renders of Bell + Ember for Portfolio Review on Thursday.
Research Project - Jedi Robe in Marvelous Desginer
One of the unforseen negatives of working with marvelous designer is that since the tool is usually used by established pros, long term 3d artists, there is not a lot of help or guidance when it comes to ensuring a correct start to a project with minimal hiccups. For example, it took around 2 hours of repeated attempts of follow the most basic of basic starting steps, and ending up with geo like that shown below, before I eventually noticed that the gridlines I was working with were much larger than those I was seeing in most every tutorial. No where had I seen it written or spoken about how important it was that these cloth sims be ran at reasonable scales, nor had I seen it used as a possible explanation when I would search "why is my marvelous designer garment exploding upon simulation."
So. step 1 for anyone trying to work in Marvelous Designer, make sure your objects are at an appropriate scale! I personally made a simple dynameshed geo of Bell and scaled it by 5x to get something that can properly and effectively provides the structure for our cloth-simmed Jedi robes to fall upon. From here, the next thing I did was create a polygon shape in the 2d viewport, click X to add points to the polygon to give more adjustability and get the shape I'm looking for in the end of a panel of robes by adjusting the points after clicking V. Do this until you have a shape vaguely like the shape on the right of the image below, and in the 3d viewport line up the plane just off set of the body with the white face side facing away form the body. From here I simply duplicated the panel and mirrored until I had 4 panels that would make up the basis of our robes' front and back panels.
Using the segment sewing tool (N) I connected all of the edges except the arm holes in the sleeves, the head hole, bottom hole, and the front most seam, as the Bell's robes are left open in the front. Once you've successfully sewn your edges together a simple tap of spacebar will run the simulation and allow the artist to tug the material and garment around to their hearts content to get the specific fit they were looking for.
For my final project I plan on making the Robes out of a posed version of Bell, exporting the retopologized and simplified geo into Zbrush and painting my specific details there, and then remeshing and UVing the robes for texturing last. As far as my remaining work in marvelous would go I just need to tweak parameters such as thickness and elasticity to my liking before retopo-ing and exporting this geo out. It really doesn't get more simple than a robe, so long as your scale is properly set up before you get going in the simulating.
Sunday, July 25, 2021
Portfolio Piece 3 - Quad Draw
Sunday, July 18, 2021
Portfolio Piece 3 - Ember Sculpt proxy
Sunday, July 11, 2021
Portfolio 2 Sprint 4
I missed what probably would've added up to around 10 hours of work over the last 4-5 days with a stomach bug I caught out of nowhere and couldn't figure out how to make better other than just waiting for it to pass, and I would say my remaining work for this character is something around that amount of time. Clone Wars style texturing is quite flat in terms of implied height or bump detailing, but very scratchy in a hand painted/sketched looking manor, and that will take some time to texture in by hand. Since my next assignment is technically a part 2/companion piece to this, in modeling Bell's animal companion, I can pull some time from the beginning of the process, and as well later when modeling a creature that has little to no props associated with it. Retopo for that should also be much quicker than this was, with like 19 piece total in the end.
Friday, July 9, 2021
Sprint 3 Delivery
For the final sprint on our VR project I finished creating and applying textures to our two door knockers, going for a weathered and oxydized look thats more metallic than the obviously rubber puppets used in the movie that were supposed to be brass anyway.
Subscribe to:
Posts (Atom)
Portfolio 3 Week 3 - Ember's Textures
To be frank I did fall behind on Ember this week thanks to multiple real life factors + other school obligations + end of semester burn out...

-
I missed what probably would've added up to around 10 hours of work over the last 4-5 days with a stomach bug I caught out of nowhere ...
-
I've started putting together the base geo and working on proportions. I still feel I've some work to do on the front legs, but on...
-
To be frank I did fall behind on Ember this week thanks to multiple real life factors + other school obligations + end of semester burn out...


