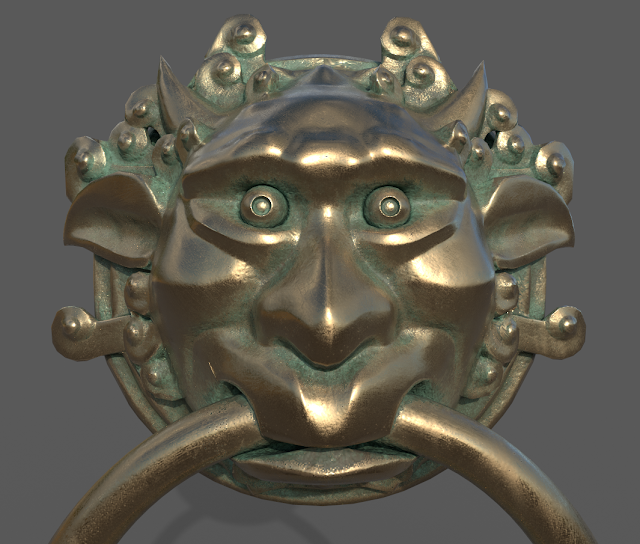
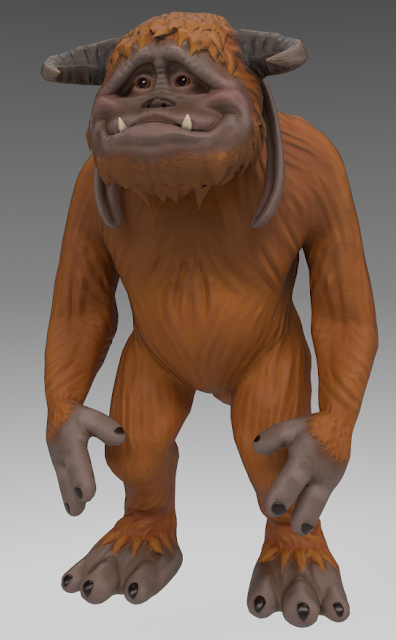
For the final sprint on our VR project I finished creating and applying textures to our two door knockers, going for a weathered and oxydized look thats more metallic than the obviously rubber puppets used in the movie that were supposed to be brass anyway.
Showing posts with label Common Art. Show all posts
Showing posts with label Common Art. Show all posts
Friday, July 9, 2021
Friday, June 11, 2021
Sprint 2 Contribution
This sprint I was assigned to create the mute doorknocker and send it on to Alex to be rigged. I accomplished that and slapped some generic materials to test the mesh map bakes, and overall the results are pretty positive.
For this upcoming 3rd sprint I just need to finalize the textures for the door knockers as well, and make any improvements that I can optimizing or tweaking textures.
Friday, May 28, 2021
Sprint 1 Contribution - Labyrinth VR
For this first sprint I UV'd Ludo's gameres geo and tested how the normals would bake onto it; it went pretty well!
proxy textures to get the point across...
I then moved onto to my Sprint 2 responsibility of sculpting the Muted Door Knocker using the above image as a reference.
WIP Sculpt in ZBrush.
Sunday, March 21, 2021
Labyrinth VR Sprint 5 - Individual Work
I've made progress of the main shapes that form Ludo's face, with details (mostly wrinkles) to be added on next. The ridges along his horns have also been added this week.
These last few weeks have been a lot of experimenting with how to achieve a sculpted stylized fur for Ludo, while also adjusting his mesh so that the fur sits far enough from his assumed frame that he looks fluffy and furry, and not simply chubby or bloated. His hands were also sculpted in ZBrush, not box-modeled, which was a first for me but proved to be easier than expected. His legs were also originally the wrong shape and have been adjusted accordingly.
Friday, February 5, 2021
Sprint 2 Delivery - Personal Contribution
For this latest Sprint, I've been modeling the Deaf Door Knocker in Maya and exporting the proxy model into Zbrush. Overall we are trying to take the art style achieved for the characters by the Jim Henson Company and bring it into our game as close as we can, perhaps making certain details more stylized/simplistic to save time across the schedule.
Stills of the Character in the Film.
Preview converted to Smoothed Geometry. This is then brought into ZBrush to be boolean'd together into 2 or 3 seperate meshes that will then be sculpted on to look more unified and cohesive.
The goal is to have the sculpt completed and the Game Resolution Model under 10k polys and succefully baking High res to Low by February 8th so that Alex can take the model and rig it for animation while I texture it.Thursday, October 15, 2020
Common Art - Free-for-All
Beauty Pass in Arnold
Normal | Beauty | AO | ID
Final Rendering of a Sailor stumbling out of the harbor the morning after he fell asleep in the ship. Thursday, October 8, 2020
Point Perspective - Common Art
Building Sets
Buildings exported as FBX, viewed in Content Browser
Scene in Maya
1 point perspective.
2 point perspective.
3 point perspective
Render of 1 point perspective. Pop colors inspired by streets of Old San Juan.
Wednesday, September 30, 2020
Week 5 - Composition
Reference Images
I chose the classic Rule of Thirds composition, with my rocket depot/outpost/station centered, the Mannequin coming over the foreground to the right, and the ship approaching from the left. My composition was inspired by the concept image above.
Beauty Pass
Normal, Toon, ID, AO passes
I began by laying some basic splash tones over the beauty pass.
Using the ID map as a selection tool I started introduced greater variation in value, saturation, hue, etc.
Background kit bashed with some images of real mountains, and a very faint gradient overlay to introduce a snow haze.
Exposure and Levels adjustments to bring balance value across the image.
Grid to show the thirds of the image, as well as the line that I hope the viewers eyes follow from one side of the image to the other.
With Toon Shader on top.
Final Render.
Subscribe to:
Posts (Atom)
Portfolio 3 Week 3 - Ember's Textures
To be frank I did fall behind on Ember this week thanks to multiple real life factors + other school obligations + end of semester burn out...

-
I've started putting together the base geo and working on proportions. I still feel I've some work to do on the front legs, but on...
-
As of now I would say I'm about 2-3 hours behind. By this point I wanted to be done with UVs on the game resolution model so that I co...
-
I missed what probably would've added up to around 10 hours of work over the last 4-5 days with a stomach bug I caught out of nowhere ...


